Learn
Last updated April 10, 2026
How to make an image transparent
without treating it like a dead-end export
If you are trying to make an image transparent, the useful question is not whether another background remover exists. It is whether your agent can isolate the subject, inspect the edges, and keep the final asset reusable for docs, product pages, and content workflows. That is where AnyCap image generation plus image understanding changes the workflow.
Answer-first summary
A useful transparent-image workflow is not only background removal. It is subject extraction, edge inspection, and output reuse. AnyCap helps the agent run that loop in one place: edit the image, inspect the result, and branch into the exact version the destination needs, whether that is a transparent cutout or a white background variant.
Generated proof
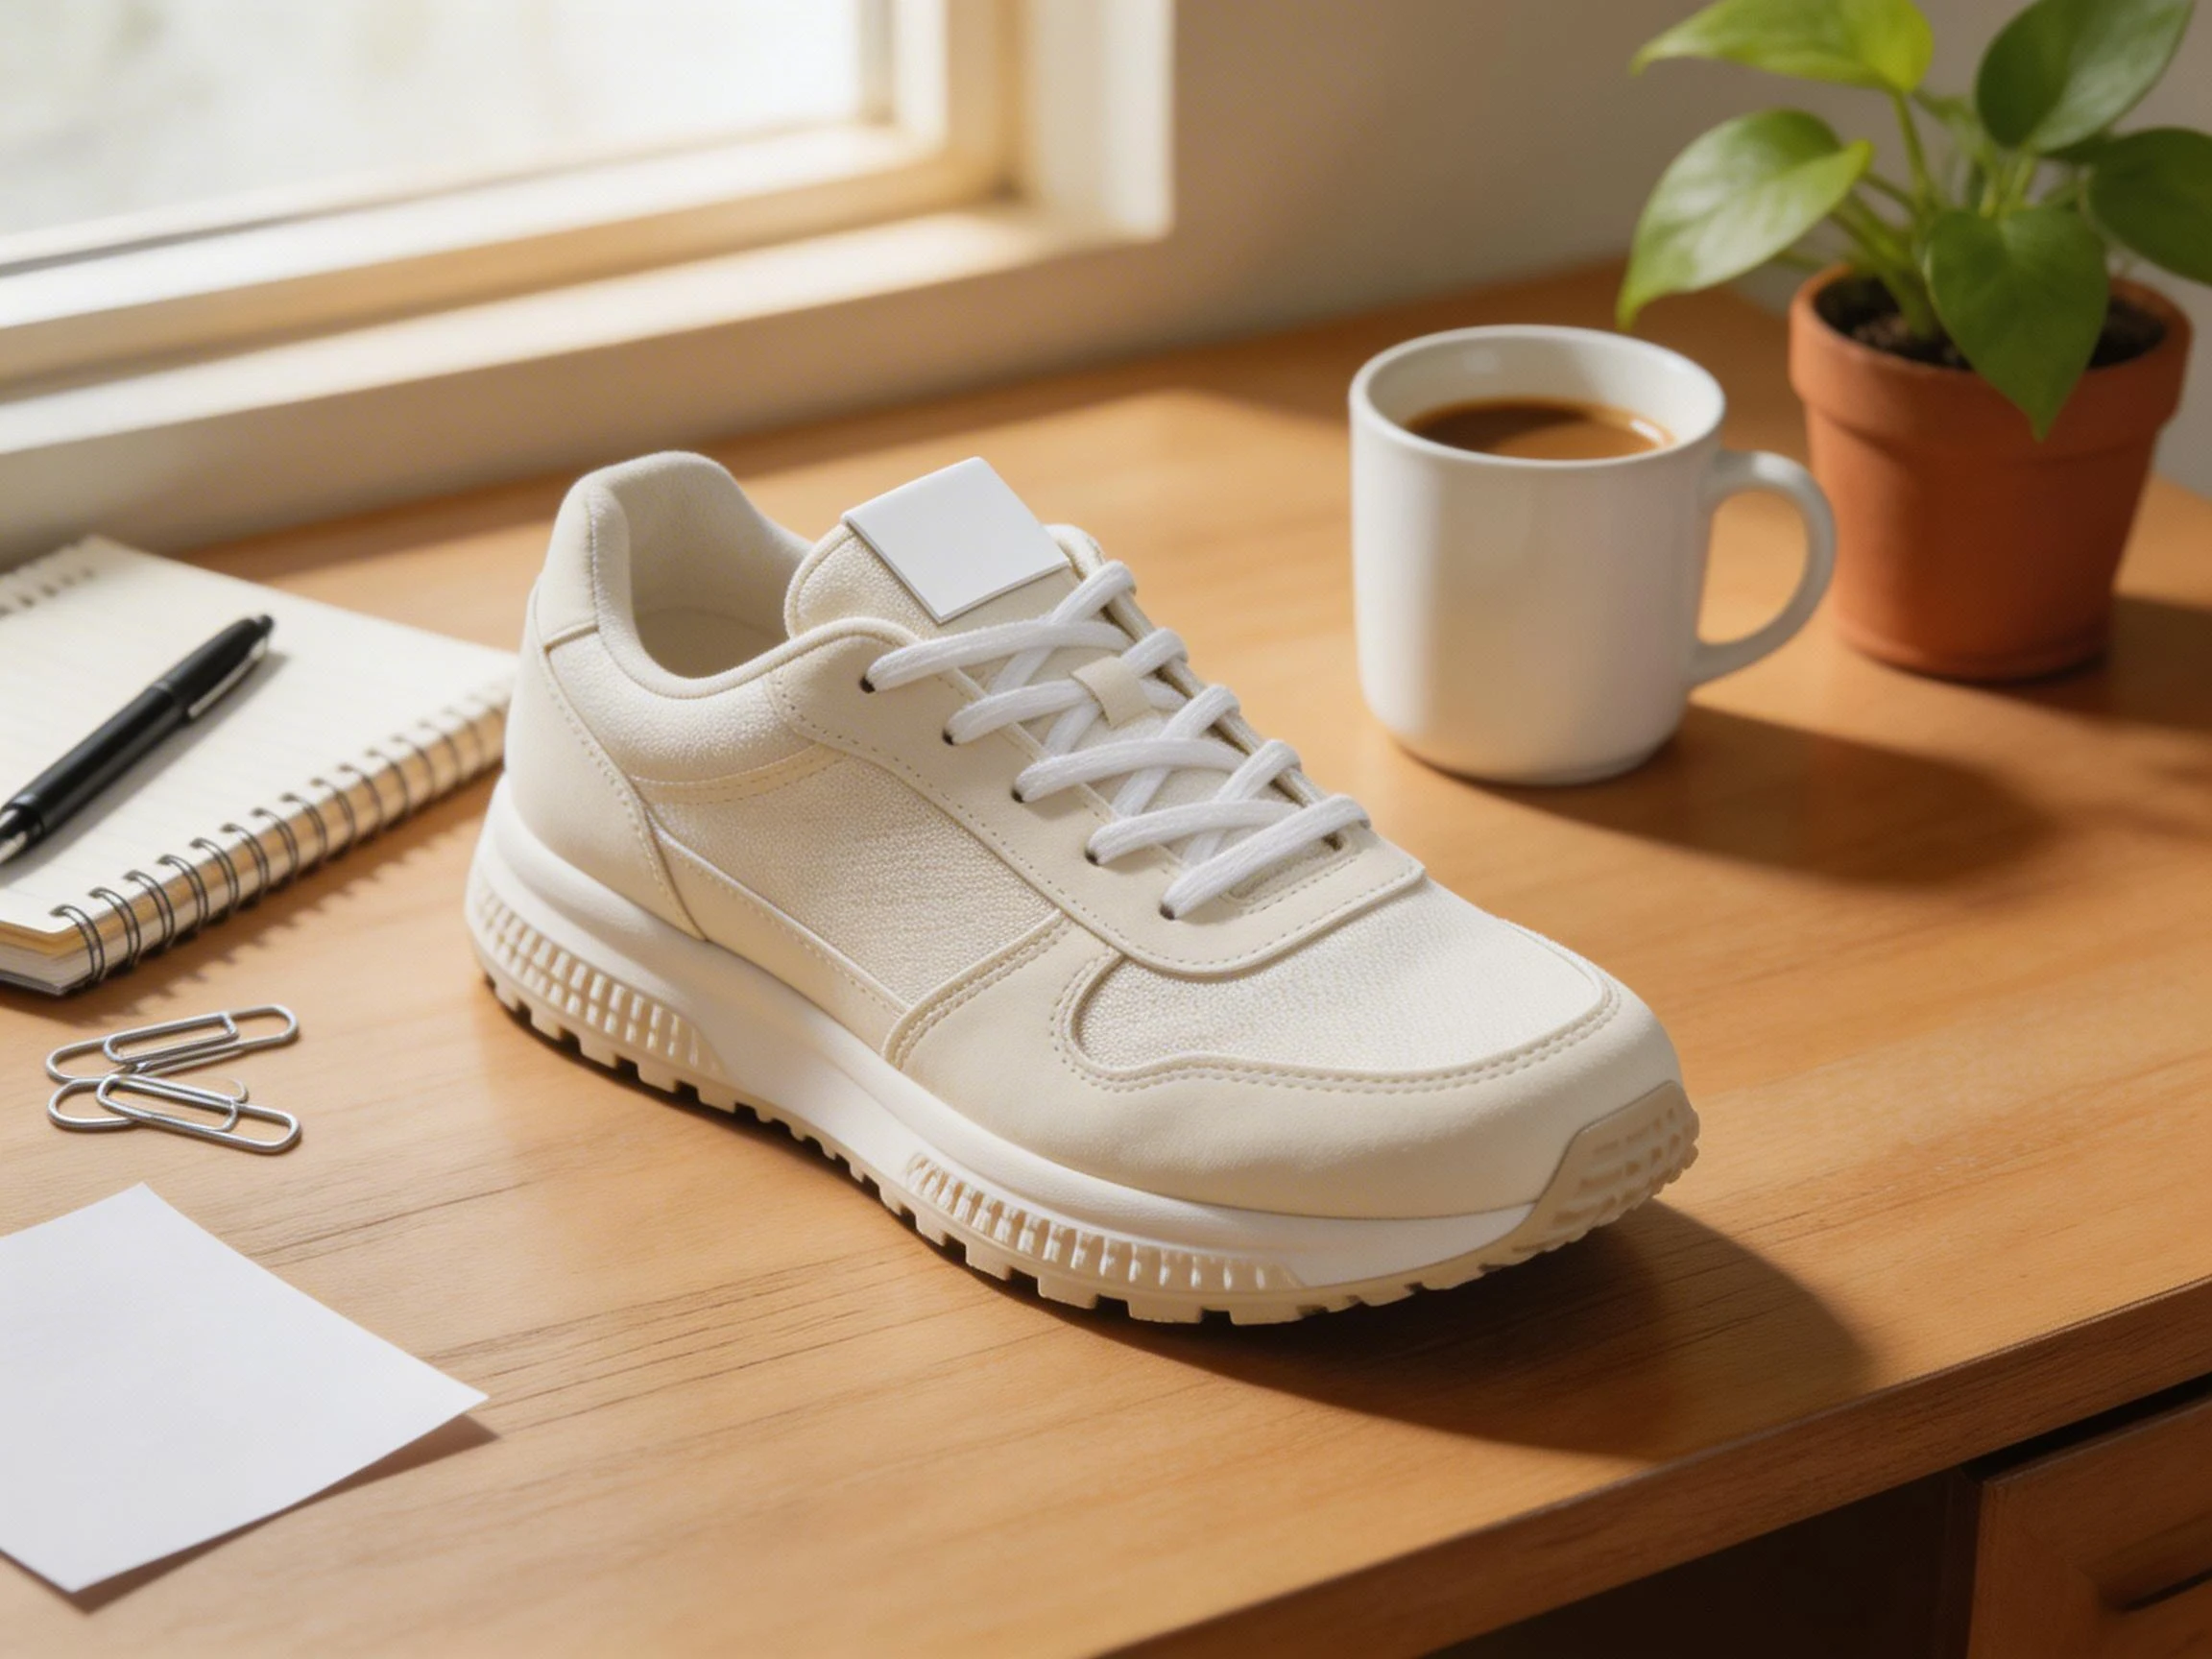
Source image in, transparent cutout out
This page uses a real before-and-after proof block instead of stock art. The left frame is the source image. The right frame is a real transparent PNG generated from that same source asset so the isolation step is visible at a glance.
Source image
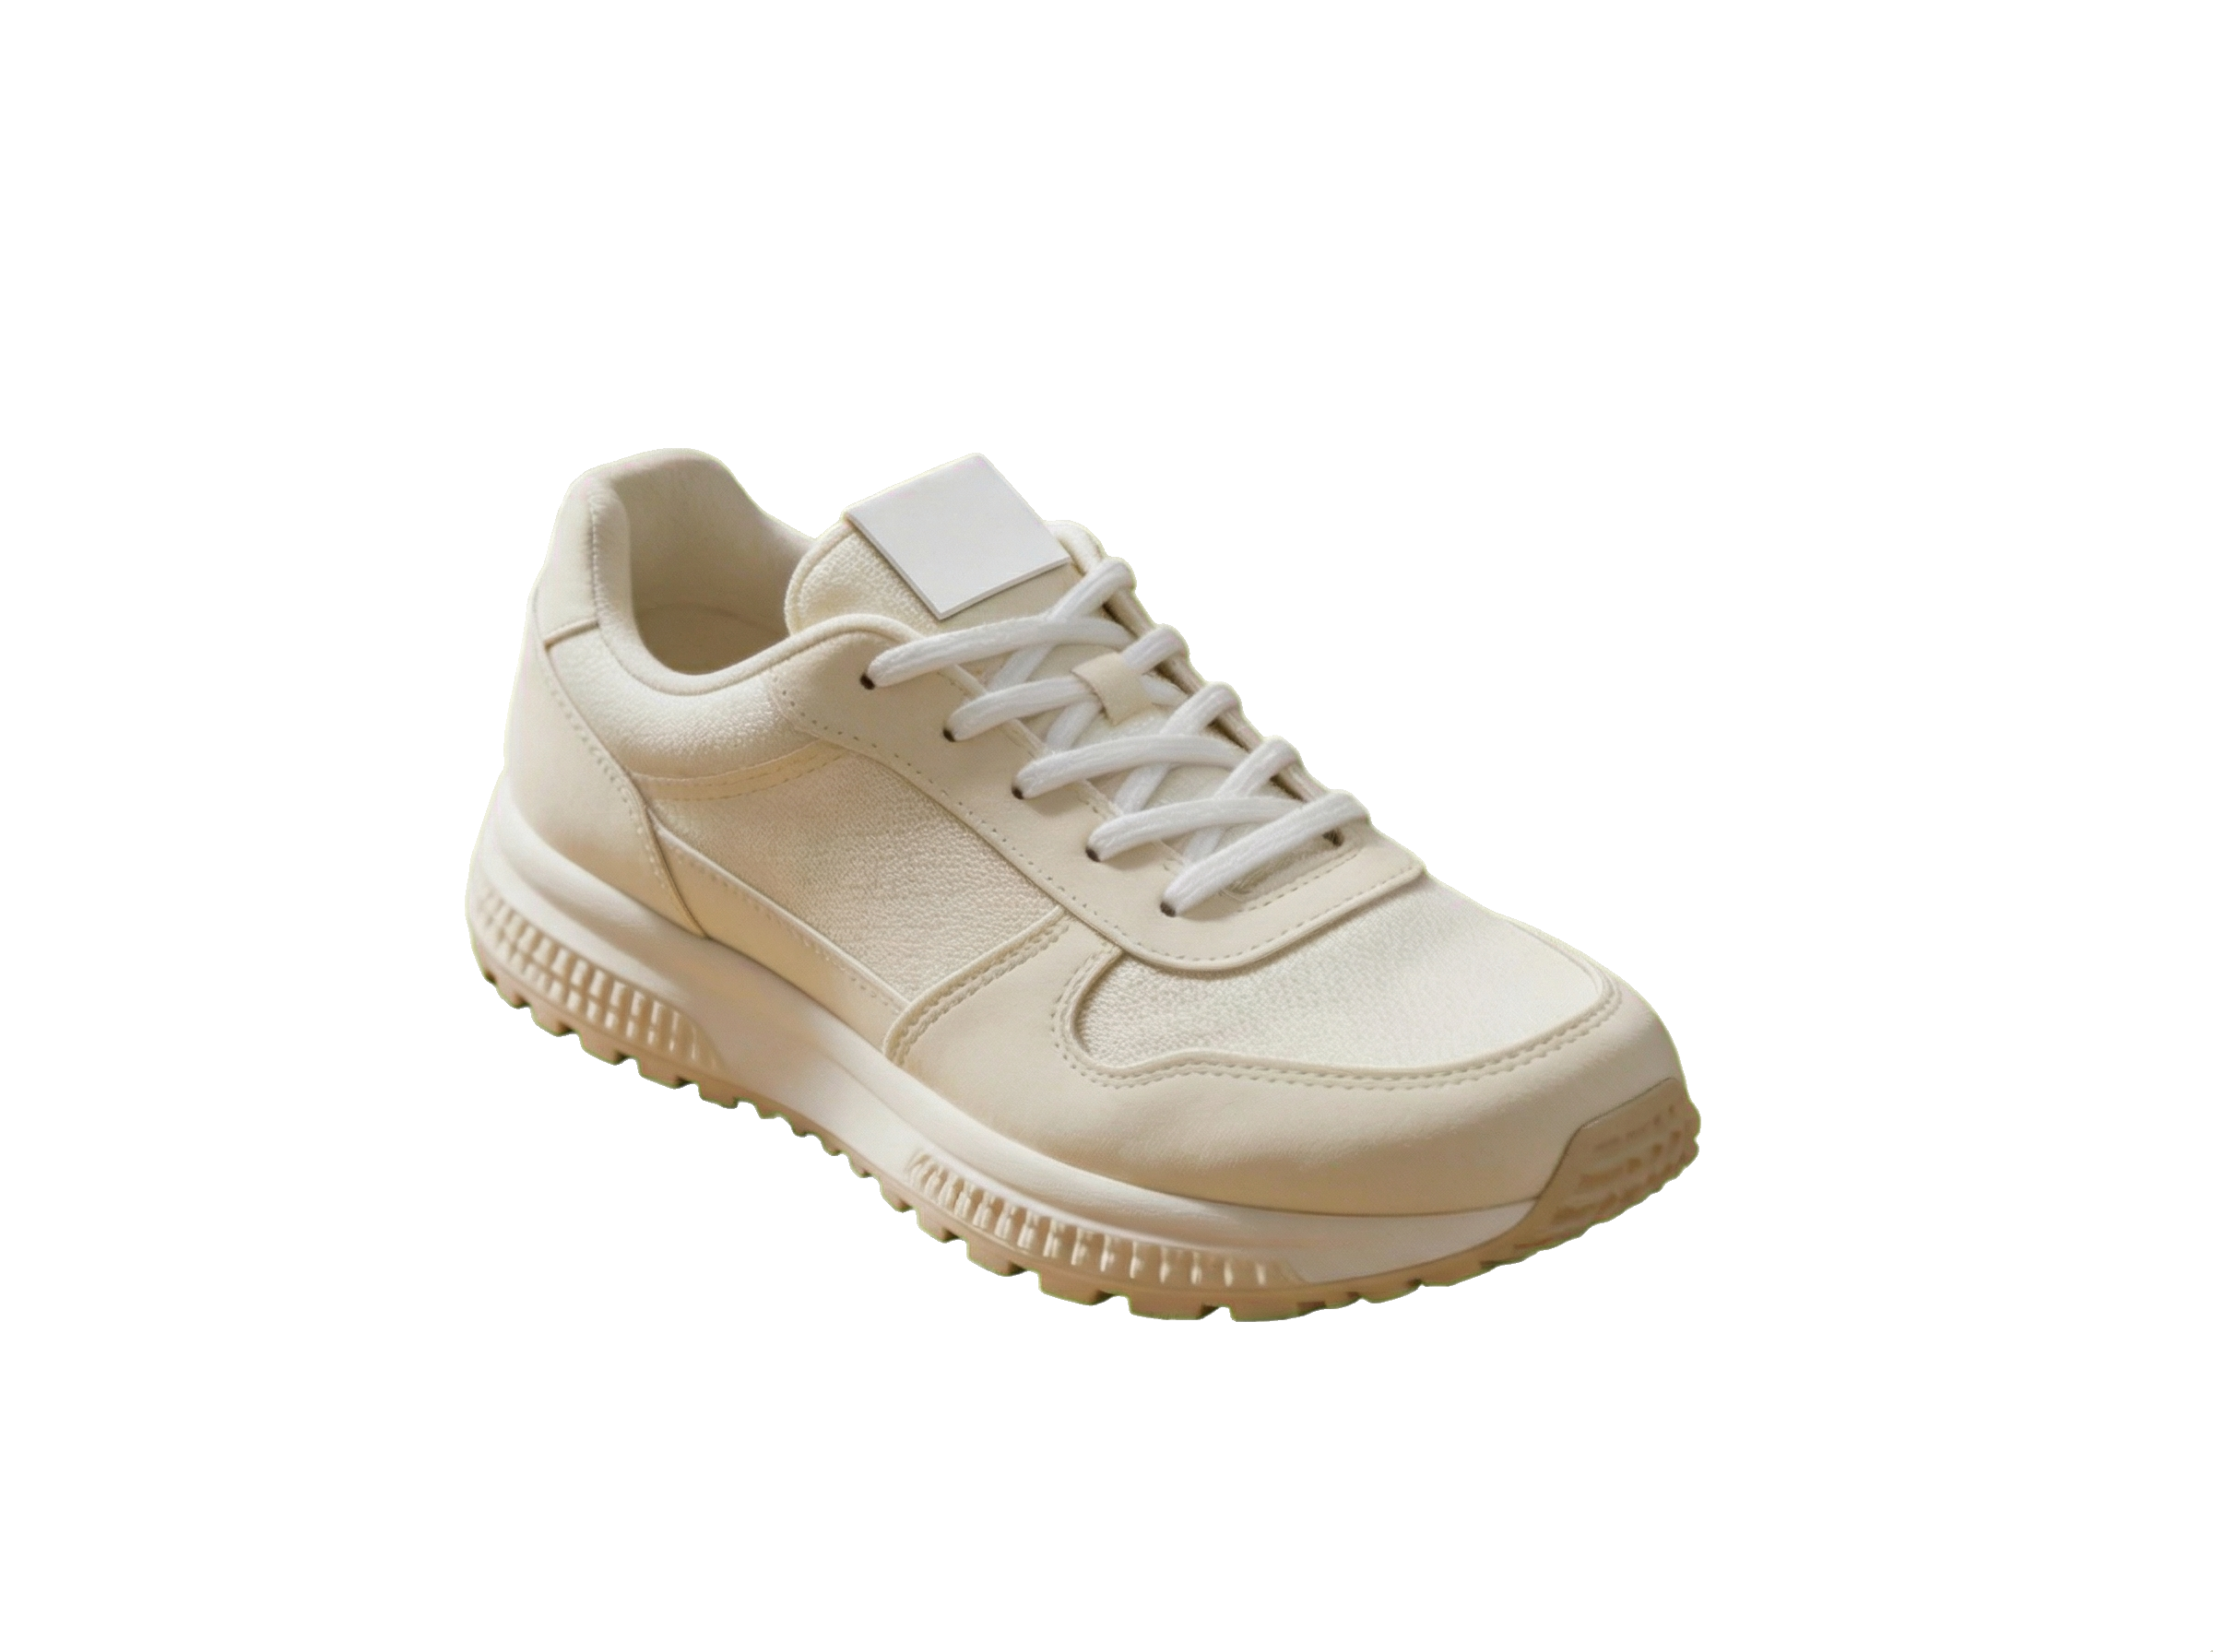
Transparent PNG cutout
Edit prompt used with AnyCap
remove the entire desk background and return only the same running shoe as a clean product cutout on a transparent background, preserve the exact shoe shape, laces, sole texture, and stitching, remove the mug and plant completely, no floor shadow, no extra objects, blank label, no text, no watermark
Why this proof matters
- It turns the page's main claim into something visual: background removal is more useful when the subject still looks clean enough to reuse.
- The checkerboard preview makes the subject-isolation step legible instead of forcing the reader to imagine what changed.
- It shows why the AnyCap workflow is not only one export step, but also a QA and reuse step.
The left image is the source draft. The right image is the final transparent PNG cutout generated from that same source asset for this page.
Quick answer
The practical answer is extraction plus QA
Making an image transparent is usually framed as a button click. In practice, the useful part is whether the subject survives the cleanup well enough to be reused in the next step. That is why the better workflow is extraction plus inspection, not export alone.
- Most 'make image transparent' jobs are really subject extraction plus edge QA, not just one click on a remover site.
- The strongest AnyCap workflow is to revise the source image, inspect the output with image reading, and keep the final file reusable as a PNG-ready cutout.
- The same workflow can branch into a white-background version, a replacement-background version, or a clean product asset for docs and listings.
Transparent background
Best when the same asset needs to land on multiple surfaces later, such as docs, decks, product listings, or page layouts with their own background treatment.
White background
Best when the destination wants a marketplace-style image, a catalog look, or a clean studio result where transparency adds no extra value.
Workflow
Five steps from source image to reusable asset
Step 1
Start with the real source image
Use the product photo, screenshot, or visual draft you actually want to reuse. The higher-fit job here is cutout cleanup, not generating a random replacement subject.
Step 2
Ask for a transparent-background cutout
Run an image-to-image edit that preserves the subject but removes the surrounding desk, room, or scene. The prompt should say what must stay, not only what should disappear.
Step 3
Inspect the edges with image reading
Check for leftover fragments around hair, laces, fingers, glass, or packaging edges. The point is not only that the background is gone, but that the subject still looks usable.
Step 4
Branch into the version the destination needs
From the same source, you can keep the transparent cutout, make a white-background marketplace image, or replace the background entirely for a new context.
Step 5
Reuse the asset in the next workflow
Keep the output local for docs and page work, or hand it off to another AnyCap step when you need storage, page publishing, or a follow-on image revision.
Comparison
Why this is stronger than a one-click remover mindset
What counts as success
Shallow default
The export button worked.
AnyCap workflow
The subject is isolated cleanly, the edges still hold up, and the asset is usable in the next step.
Quality control
Shallow default
You eyeball it once and hope the crop is good enough.
AnyCap workflow
The agent can inspect the cutout and catch leftover background fragments or awkward edge damage.
Follow-on edits
Shallow default
You often need to restart in another tool for a white background or a new scene.
AnyCap workflow
The same AnyCap image-edit loop can branch into transparent, white-background, or replacement-background versions.
Reusability
Shallow default
The output is treated like a final download.
AnyCap workflow
The asset stays inside a broader agent workflow for docs, listings, publishing, and later revisions.
Model choice
Pick the model based on where the job starts
Best first choice for cutouts
Nano Banana Pro
Use this when the source image already exists and the real job is to preserve the subject while cleaning or removing the background.
Best for faster iteration
Nano Banana 2
Use this when you want multiple cleanup passes quickly or when the workflow may branch into several product or content variants.
Best when you still need the source image
Seedream 5
Use this when there is no starting asset yet and you want a stronger first-pass product image before the cutout workflow begins.
First-hand validation
What we checked on the live workflow
Capability surface confirmed
During page production on April 9, 2026, a live AnyCap status check confirmed image generation, image editing, image reading, Drive, Page, and web retrieval were available in the current environment.
Schema confirmed
Nano Banana Pro and Nano Banana 2 were checked against the live schema, and the current image-to-image flow uses the `images` parameter instead of older prompt guesses.
Proof images generated
The source image and cutout shown on this page were generated during the live workflow through AnyCap rather than mocked after the fact in a separate design tool.
Output inspected
The final cutout file was verified as an RGBA PNG with a real alpha channel, then composited onto a light background and checked through image reading to confirm the edge looked clean without a visible green halo.
CLI examples
Example commands that match the current schema
Create a transparent cutout
anycap image generate \
  --model nano-banana-pro \
  --mode image-to-image \
  --prompt "remove the background and return only the same subject on a transparent background, preserve the exact shape and edges, no extra objects, no text, no watermark" \
  --param images=./source-product.png \
  --param aspect_ratio=4:3 \
  --param resolution=2k \
  -o transparent-cutout.png
Create a white-background version from the same source
anycap image generate \
  --model nano-banana-pro \
  --mode image-to-image \
  --prompt "replace the background with a clean white studio backdrop, preserve the exact subject and edges, centered marketplace-ready product photo, no text, no watermark" \
  --param images=./source-product.png \
  --param aspect_ratio=4:3 \
  --param resolution=2k \
  -o white-background-product.png
QA the cutout with image reading
anycap actions image-read \
  --file ./transparent-cutout.png \
  --instruction "Describe the image, say whether the subject edges look clean, and mention any leftover background fragments, visible text, or watermark."
FAQ
Questions that usually come up next
Is making an image transparent the same as making the background white?
No. A transparent image keeps the background removed so the asset can sit on different surfaces later. A white background version is better when the destination needs a clean catalog or marketplace photo.
Which AnyCap model should I use first for background removal?
Use Nano Banana Pro first when you already have a source image and want the subject preserved through an image-to-image edit. Use Nano Banana 2 when speed and multiple cleanup passes matter more than the strongest single revision. Use Seedream 5 only when you still need to create the source image itself.
Why use an agent workflow instead of a one-click remover?
Because the job usually does not end at 'background removed.' You often need to inspect the edges, confirm there is no leftover clutter, make a white-background version for another channel, and reuse the asset across docs, pages, or product listings.
Can AnyCap check whether the cutout actually looks clean?
Yes. After generation, you can use AnyCap image reading to inspect the result and ask whether the subject edges are intact, whether stray background fragments remain, and whether there is any visible text or watermark.
Next move
Go deeper from the workflow that fits
How to Change a Photo Background
Move here when the next step is replacing the removed background with a studio, pedestal, or contextual scene.
How to Make Background White for Product Photos
Use this follow-on workflow when the transparent cutout needs to become a marketplace or catalog-style white-background asset.
Nano Banana Pro
Go deeper on the model that currently fits the strongest subject-preserving cutout workflow.
Install AnyCap
Move here when you want the shortest path from this page to a working CLI setup.